
Showing posts with label Do It Yourself. Show all posts
Showing posts with label Do It Yourself. Show all posts
Quick and Cheap D-I-Y Skincare from MakeupAlley.com!
Labels:
Aspirin Mask,
Baking Soda,
Bragg's Apple Cider Vinegar,
Cheap ideas,
Do It Yourself,
MakeupAlley,
Milk of Magnesia,
Skincare

What beauty-obsessed product junkie doesn't love scouring MakeupAlley's forums and review section for tips? This girl certainly does!
I was looking for some do-it-yourself beauty ideas in their review section, and I came across some interesting ones that I've tried or plan on trying very soon!
Under the Skincare review section, the Aspirin mask is highly rated. If you haven't tried this mask yet, I highly suggest that you do! I do this all the time and it is great. I think I posted about
 this before, but just to recap, I'll repeat myself. Just sprinkle a few uncoated aspirin tablets with warm water to dissolve into a paste, add a squirt of honey, and smear on for a few minutes. If you're feeling fiesty, mix the aspirin paste in with your favorite pre-made mask, such as Queen Helene's Mint Julep Mask (also highly rated), and leave on for about 10-15 minutes. Love it!
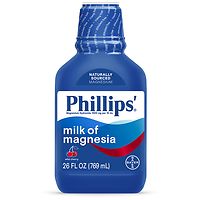
Another cool tip is to use Milk of Magnesia (or Mylanta) very lightly as a primer, after moisturizer, under mineral makeup. This is apparently very good at absorbing excess oil. I plan on trying MoM as an on-the-spot blemish treatment, as it supposedly has anti-inflamatory and antibacterial properties. Plain ol' honey has very high ratings as a facial treatment as well, although most of the readers seem to be mixing it with something to apply or to use as an exfoliator or mask (with brown sugar, cornmeal, or green clay).
Over 200 reviewers suggested Extra Virgin Olive Oil as a body or hair moisturizer, while around 100 recommended Coconut Oil. Bragg's Apple Cider Vinegar apparently makes an awesome toner, but make sure you dilute it first!
 One of my favorite tips is to sprinkle a little baking soda on your toothbrush along with your toothpaste before brushing in order to get your teeth feeling super clean and white.
What are some of your favorite beauty tips? Have you tried any of these?
Do It Yourself: Lip Balm Stain!
Labels:
Bargain Finds,
Do It Yourself,
Lip Balm,
Lip Stain,
Makeup,
Tutorials

 I had some free time so I decided to do a little tutorial on making your own lip balm stain. This, in essence, would be similar to Benetint Lip balm, but a lot easier on the wallet! You can use whatever balm you have available, from Chapstick to Chicken Poop, anything will do. Also, a fun "green" alternative would be to use Burt's Bees Lip Balm and Organic Food Dye. Not only is this balm useful for lip stain purposes, but it is also great for moisturizing since you are using a balm you already love. Have fun experimenting with colors and mixtures... this is fairly easy, but you might make a bit of a mess in the kitchen if you aren't careful!
Things you'll need:
- Microwave safe container with a spout, like a measuring cup
- Plastic disposable cup for mixing
- Toothpicks or other flat tool for mixing, I used a metal chopstick
- Wilton Gel Icing Color or other Food Coloring (Red, or other colors if you'd like to mix)
- Stick of Lip Balm, I used Badger Cocoa Butter Lip Balm in "Sweet Orange"
- Microwave! Mine is 1200Watts, so timing may vary
- Optional: Empty Lip Balm Pot Container


First, start off by twisting the tube of lip balm all the way up and removing the balm from the tube. If your balm is very soft, like Blistex Complete Moisture, you might want to consider putting the mixture, when complete, into the optional pot container since it might not stay intact otherwise. But, that's up to you to decide later. For now, place the balm you just emptied into the microwave safe bowl/cup and microwave on high for 15 second intervals, until your balm has melted completely. This time will vary, mine took about 50 seconds, so be sure to keep an eye on the balm!


Then, you wanna add your color. I used pure red, so I didn't have to worry about mixing colors, but you could add a little blue to make a berry stain that would be gorgeous as well! Just be sure to take a nice hefty amount. Remember: you want this to stain your lips, not just color them temporarily. Keep the amount in proportion to the amount of balm you have though... I had a decent amount of balm so I added about 1/4tsp. If you want a really dark stain, add more. If you want a light stain, add less... you know the drill.
Now, this is important, when you add the color if you are using a gel food dye like I used, pop that baby back into the microwave for an additional 10-15 seconds. This is important because the gel is harder to blend into the balm than liquid so you want to make sure it really melds into it. Remove from the microwave immediately and start stirring like you would with a whisk. Whip it up! While the balm is in liquid form, it will NOT blend directly with the food dye. Keep mixing as if you are trying to blend salad dressing.
You will notice the balm starting to harden up; this is your cue to pour the mixture into your original tube! Make sure you've twisted the tube back "down" so that it can be filled up! Pour away. If your mixture has hardened too much to pour, like mine did, then scoop it in. It doesn't have to be perfect! If you want a more streamlined final result, put it in the optional pot container or melt it down in the microwave if your original tube can handle it. Be careful while microwaving these products and be mindful. No metal or foil in the microwave, please! It might be kind of sloppy otherwise, so if you're nit-picky, feel free to smooth it over by slicing off the top or patting it down instead. I didn't bother.
Let the mixture set for about 15 minutes, then enjoy. Apply with a lip brush or q-tip, as this is sure to stain your fingers. Make sure you exfoliate your lips (warm washcloth, toothbrush and Vaseline -- pick your poison) prior to applying, as this will stick to and color any dry areas first! It will look like a matte lipstick on and then as it wears off you should be able to see how it has stained your lips nicely. The longer you let it sit, the more stained your lips will become. I took a quick pic for posting purposes:
Now, this is important, when you add the color if you are using a gel food dye like I used, pop that baby back into the microwave for an additional 10-15 seconds. This is important because the gel is harder to blend into the balm than liquid so you want to make sure it really melds into it. Remove from the microwave immediately and start stirring like you would with a whisk. Whip it up! While the balm is in liquid form, it will NOT blend directly with the food dye. Keep mixing as if you are trying to blend salad dressing.
You will notice the balm starting to harden up; this is your cue to pour the mixture into your original tube! Make sure you've twisted the tube back "down" so that it can be filled up! Pour away. If your mixture has hardened too much to pour, like mine did, then scoop it in. It doesn't have to be perfect! If you want a more streamlined final result, put it in the optional pot container or melt it down in the microwave if your original tube can handle it. Be careful while microwaving these products and be mindful. No metal or foil in the microwave, please! It might be kind of sloppy otherwise, so if you're nit-picky, feel free to smooth it over by slicing off the top or patting it down instead. I didn't bother.
Let the mixture set for about 15 minutes, then enjoy. Apply with a lip brush or q-tip, as this is sure to stain your fingers. Make sure you exfoliate your lips (warm washcloth, toothbrush and Vaseline -- pick your poison) prior to applying, as this will stick to and color any dry areas first! It will look like a matte lipstick on and then as it wears off you should be able to see how it has stained your lips nicely. The longer you let it sit, the more stained your lips will become. I took a quick pic for posting purposes:

Hope you love it, and here's to a beautiful Tuesday!
Any questions or additional ideas, let me know!
D-I-Y Kitchen Skincare!
Labels:
Aspirin Mask,
Crisco,
Do It Yourself,
Mask,
Oatmeal,
Skincare,
Yogurt
In keeping with the "Go Green" theme, I am sharing some of the best products to use that are natural, organic, and can be found right at home! If you don't like making your own skincare treats at home, there are plenty of natural alternatives available in stores everywhere... otherwise, enjoy these skincare tips and tricks using products you would find in your own kitchen!

1/2 cup plain yogurt
3-4 tablespoons of unflavored instant oats
Mix together until it becomes a spreadable paste (...sounds luxurious!), then wait until the oats soften and release their oat goodness into the yogurt. Apply to your face. This should most likely be done over a sink because oat crumbles may fall off. Keep the mask on until it begins to feel tight. Then wash off with warm water and a washcloth. If you need to, moisturize afterwards... otherwise, enjoy your smooth, soft skin!
It sounds gross, it looks gross, it smells kind of good... but most importantly... it is EXCELLENT for your skin! The oatmeal will exfoliate, calm and soothe, and the yogurt will naturally moisturize and balance out your skin. Also, yogurt is laden with probiotics that encourage good bacteria, which is essential to fighting off the bad bacteria, such as that trapped in acne, etc.
It sounds gross, it looks gross, it smells kind of good... but most importantly... it is EXCELLENT for your skin! The oatmeal will exfoliate, calm and soothe, and the yogurt will naturally moisturize and balance out your skin. Also, yogurt is laden with probiotics that encourage good bacteria, which is essential to fighting off the bad bacteria, such as that trapped in acne, etc.
------------------------------------------------------
Want a natural alternative to Vaseline, Aquaphor, and other petroleum jelly/mineral oil based products? Try Crisco!!! I am not crazy. Crisco is shortening, not lard! It is made from vegetable oils that will comfort, soften, and moisturize the skin. It contains Vitamin E, which is great for skin as well. Crisco is also great for people who suffer from Eczema, like myself. It makes an excellent hand cream and body cream, and, if you're brave enough, you can even use it on your face. Crisco, when used in moderation, should not clog your pores, but everyone's skin is different. If you've got a rough patch of skin, give it a shot :)
------------------------------------------------------
Aspirin Mask for blemishes or milia:Dissolve several tablets of uncoated aspirin in a small amount of hot water (optional: add a tablespoon of honey into the aspirin to make it easier to spread). Apply to your face, or just to blemishes, and leave on for 15 minutes or so. Wash off and you should be good to go!
------------------------------------------------------
If you are looking for a natural toner, try diluting Apple Cider Vinegar! For a quick, cheap exfoliant, try Baking Soda or Sugar!
------------------------------------------------------
What are your tried and true D-I-Y skincare tips? Prefer sticking to store-bought products?
Let me know!
Youtube: SWAV "Frostbitten" Eye Look Tutorial!
Labels:
About Face,
Do It Yourself,
Eye Looks,
MAC Fluidline,
Makeup,
She Space,
Urban Decay Primer Potion

Yay! My first YouTube attempt!

Let me know what you think!
Ten Do-It-Yourself Hair Dye Tips!
Labels:
Do It Yourself,
Hair,
Hair Dye

A note from Nicole (the voice behind S.W.A.V.):
 As an indecisive person, throughout highschool and early college, I experimented with many hair looks. From permed to chemically straightened, bangs, no bangs, layers, one length, too-short, and long with extensions, I've been there and done it all. Tonight I am dyeing my hair at home, a process I've done many times before... and I've decided to share with you some helpful hints.
Just as an intro, for those of you who don't know me personally, my hair has been every color under the sun. Bleach blond, various shades of red, highlights all over, black, brown, light brown, dark brown, you name it. I never ventured into the realm of blues, pinks, and other "non-traditional" colors, and I probably never will (just a personal preference).
[The one that shocks everyone the most is, and always has been, the blonde. Various Asian girls (I am half), such as Tila Tequila and others, are bottle blondes and it's not too shocking. This is a look that is debatable; some people think it looks good, others think it looks bad. That's me in the picture, by the way! I'm indifferent on it... I think it depends on the shade of blonde and the style. Regardless, from my days as a blonde, I noticed several things. I only dyed my hair blonde when I was feeling confident. I would bleach first, of course, and then neutralize with dye afterward. Damaging? Yes. Rewarding? Sometimes. I would hear the positive AND the negative reactions of those around me. I didn't give a f*ck. It was my hair, and I wanted to be blonde that month, or that week, or whatever. But alas, I've grown out of that stage for now.]
So anyway, here I am, the at-home dye expert, at your service. I am dye-ing my hair L'Oreal Preference 4R (Dark Auburn) tonight. I have yet to try this color, as I usually opt for Feria in Brilliant Bordeaux when I'm feelin' the red. Wish me luck, and feel free to leave comments/ask questions if you need help with your own hair-dye endeavors. Without further ado....
Ten Helpful Hair-dyeing tips!
- Always protect your area, skin, and clothes. I usually wear an old ratty tee shirt for this, and I take extra care to slather my skin (neck, ears, hairline) with Vaseline or Cold Cream... this prevents dye from seeping into your skin and staining you in these places. Don't learn the hard way!
- Also, if you have long hair, buy more than one box of dye. Better that you have it in the bathroom in case you run out of dye... just don't open it until you run out. If you don't use it, save it for when you do touch ups, or take it back to the store. Buy a shower cap also to put on your head as the color develops, holding your hair in.
- I usually will be dyeing my hair in the bathroom, so I put the instructions from the box into the sink, with the box in there as well. This provides an area for me to throw the empty bottles and gloves without staining the countertop. Usually, I will put the used bottles back into the hair dye box for easy removal.
- Prepare for the worst. I keep a damp washcloth on the counter while I am dyeing, in case I spill some dye (inevitable) on my arms or the floor, or wherever.
- Try not to spatter. Don't be careless with the dye, but make sure you evenly coat your hair. If you are running out of dye, take the cap off the bottle and pour the mixture directly onto your gloved hands to apply where needed. This method is also useful if you don't want to fumble with attached plastic "applicator combs" or any odd contraption. The main purpose of using dye is to coat all the hair you want dyed with it.
- Pile your hair on top of your head (don't use any metal clips or anything metal... the chemicals in the dye will react with it!), put on your shower cap when your color is developing and clean up the bathroom in the meantime. Take the gloves off carefully if you are going to be doing other things while the color develops, you'll want to put them on later for when you wash out the color.
- Keep a timer/clock/watch nearby, or if you will be moving around, be sure to keep track of time. You don't want to leave the dye in for too long, or worse, wash it out too early.
- If you have a lot of bottles in your shower, take them out before rinsing out your hair. If you don't the dye can get under the bottles and stain them (and possibly your shower!).
- Rinse your hair, and be sure to apply the provided conditioner AS SOON AS the water rinses clear. If you want to, you CAN shampoo your hair lightly at this point to wash away some of the dye if you are not doing a dramatic change and want a natural look. Otherwise (if you're going from blonde to brown, for instance), no poo for you.
- Rinse with cool water after washing out the conditioner to give your hair extra shine!
Subscribe to:
Posts (Atom)

 Posts
Posts

